Transform Your Wiring Setup: Discover the Benefits of a 48 Port Cat6 Patch Panel for Enhanced Network Performance
Transform Your Wiring Setup: Benefits of a 48 Port Cat6 Patch Panel
Table of Contents
- Introduction to 48 Port Cat6 Patch Panels
- What is a Patch Panel and Its Functionality?
- Benefits of Using a 48 Port Cat6 Patch Panel
- Installation and Setup of a 48 Port Cat6 Patch Panel
- Common Mistakes to Avoid During Installation
- Maintenance Tips for Optimal Performance
- FAQs about 48 Port Cat6 Patch Panels
- Conclusion
Introduction to 48 Port Cat6 Patch Panels
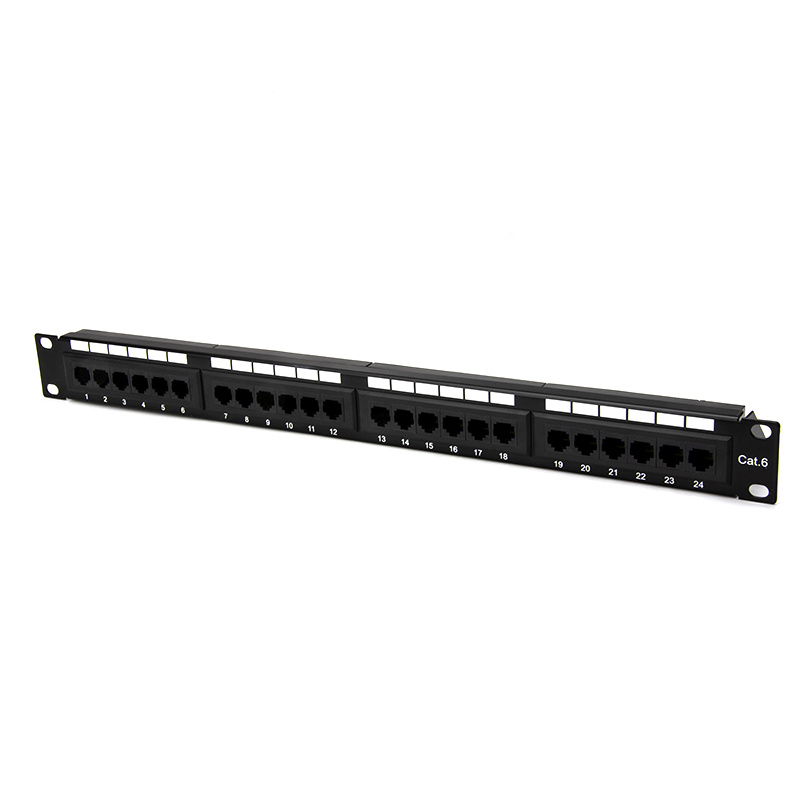
In today’s digital age, having a robust networking setup is essential for both residential and commercial environments. A **48 Port Cat6 Patch Panel** serves as a crucial component in organizing and managing your network cabling. Understanding its benefits can help you make an informed decision to enhance your wiring setup.
What is a Patch Panel and Its Functionality?
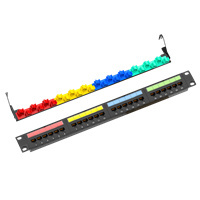
A patch panel acts as a central point in a network that connects incoming and outgoing lines. In essence, it provides a bridge between various network devices, allowing for **effective management and organization** of network cables. Each port on the panel corresponds to different network devices, like switches, routers, and computers, leading to a **more streamlined wiring setup**.
The **Cat6 standard** is specifically designed for high-speed data transfer, supporting bandwidths up to 10 Gbps. Thus, a **48 Port Cat6 Patch Panel** is ideal for larger networks, providing ample connectivity options without sacrificing performance.
Benefits of Using a 48 Port Cat6 Patch Panel
Investing in a **48 Port Cat6 Patch Panel** offers numerous advantages, especially for businesses and tech-savvy homeowners. Let’s explore these benefits in detail.
Enhanced Organization of Cabling
One of the primary advantages of using a patch panel is the **organization of wiring**. Instead of having a chaotic mix of cables scattered across your space, a patch panel facilitates a neat and structured approach. By **labeling each port**, you can easily identify which device connects to which port, simplifying troubleshooting and maintenance.
Improved Network Performance
The **Cat6 technology** utilized in this patch panel enables faster data transmission, ensuring that your network handles data efficiently. This leads to reduced latency and improved overall performance, especially in environments that require high-speed connectivity. Be it video conferencing, online gaming, or data transfer, a **high-quality patch panel** can significantly enhance your user experience.
Future-proofing Your Network
As technology evolves, your networking needs may change. A **48 Port Cat6 Patch Panel** provides the flexibility to accommodate future upgrades without requiring a complete overhaul of your existing setup. This makes it a wise long-term investment, ensuring that your network remains compatible with emerging technologies.
Cost-effectiveness and Scalability
Setting up a network can be cost-prohibitive, especially when considering switch ports and cabling. A patch panel allows for **cost-effective scalability**. You can easily add new devices by connecting them to the existing patch panel instead of adding switches. This adaptability can lead to significant savings both in installation and future expansions.
Installation and Setup of a 48 Port Cat6 Patch Panel
The installation of a **48 Port Cat6 Patch Panel** can initially seem daunting, but with the right approach, it can be a smooth process. Here’s a step-by-step guide to help you through the setup.
1. **Gather Necessary Tools and Materials**
Ensure you have all the tools needed for the installation, such as a punch-down tool, Ethernet cables, cable ties, and a cable tester.
2. **Choose an Appropriate Location**
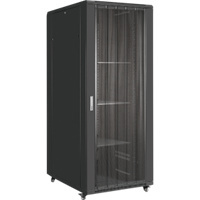
Select a suitable area for the patch panel, ideally within a **network rack** or wall-mounted enclosure, that allows for easy access and airflow.
3. **Prepare the Cables**
Measure and cut your cables to the required length. Strip the ends of the cables to expose the wires, and follow the T568A/B wiring standards for termination.
4. **Terminate the Cables on the Patch Panel**
Using a punch-down tool, connect the cables to the corresponding ports on the patch panel. Be sure to secure them tightly to avoid any signal loss.
5. **Testing the Connections**
After all cables are connected, use a cable tester to verify that each connection is functioning correctly. This step is crucial to ensure optimal network performance.
6. **Labeling**
Once everything is tested and confirmed to be working, label each port for easier identification in the future.
Common Mistakes to Avoid During Installation
To ensure a successful installation, be mindful of the following common errors:
- **Neglecting Cable Length**: Ensure that your cables are not too long, as this can lead to signal degradation.
- **Improper Termination**: Follow the wiring standards closely to avoid connectivity issues.
- **Ignoring Ventilation**: Ensure that your installation site allows for proper airflow to prevent overheating.
Maintenance Tips for Optimal Performance
Like any other component of a network, a **48 Port Cat6 Patch Panel** requires regular maintenance to function optimally. Here are some tips to maintain your patch panel:
1. **Regularly Check Connections**: Periodically inspect the connections to ensure they remain secure.
2. **Keep the Area Clean**: Dust and debris can affect performance, so keep the panel area tidy.
3. **Update Labels**: As your network evolves, updating labels will help maintain organization and ease of use.
FAQs about 48 Port Cat6 Patch Panels
1. What is the maximum distance for Cat6 cables?
The maximum length for Cat6 cables is **100 meters** (328 feet) for optimal performance.
2. Can I use a Cat6 patch panel with Cat5e cables?
Yes, a Cat6 patch panel is backward compatible with Cat5e cables, allowing you to connect older devices easily.
3. Do I need to purchase additional hardware with a patch panel?
Typically, a patch panel is used in conjunction with switches and routers, so ensure you have those necessities for a complete setup.
4. How do I troubleshoot a port that isn't working?
Start by checking the cable connections, using a cable tester to identify any faults. If the issue persists, verify the switch or router settings.
5. Is it necessary to hire a professional for installation?
While it is possible to install a patch panel yourself, hiring a professional can ensure proper setup and optimal performance, especially in complex networks.
Conclusion
A **48 Port Cat6 Patch Panel** is an invaluable asset for managing and enhancing any network setup. By offering improved organization, better performance, scalability, and the potential for future upgrades, it sets the foundation for a reliable and efficient communication infrastructure. Whether you are upgrading your home network or managing a business’s complex wiring needs, investing in a patch panel can yield significant benefits. Embrace modern networking with a **48 Port Cat6 Patch Panel** and transform your wiring setup today.
Latest news & events
Sep 08,2025
Punch Down Keystone Jack – Reliable Connectivity for Modern Networks
The Punch Down Keystone Jack ensures fast, secure, and reliable network connections, designed for easy installation and stable data transmission.
Learn more

