Understanding the Installation Process of Terminating Cat6 Keystone Jacks: A Comprehensive Guide
Understanding the Installation Process of Terminating Cat6 Keystone Jacks
Table of Contents
1. Introduction to Cat6 Keystone Jacks
2. Tools Required for the Installation Process
2.1 Essential Tools for Successful Installation
2.2 Optional Tools to Enhance Your Setup
3. Preparing the Cat6 Cables for Termination
3.1 Stripping the Cable Insulation
3.2 Arranging the Wires According to TIA Standards
4. Step-by-Step Guide to Terminating Cat6 Keystone Jacks
4.1 Connecting Wires to the Keystone Jack
4.2 Ensuring Secure Connections
5. Testing the Termination
5.1 Using a Cable Tester
5.2 Troubleshooting Common Issues
6. Best Practices for Long-Lasting Connections
7. Frequently Asked Questions (FAQs)
8. Conclusion
1. Introduction to Cat6 Keystone Jacks
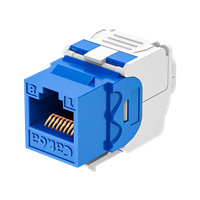
Cat6 keystone jacks serve as essential components in structured cabling systems, offering high-speed data transmission for various applications, including residential and commercial networks. Their design facilitates a seamless connection between network cables and wall plates, enabling reliable and efficient data transfer. Understanding the installation process of terminating these jacks is crucial for achieving optimal network performance.
2. Tools Required for the Installation Process
Before embarking on the installation journey, it's imperative to gather the necessary tools to ensure a smooth process.
2.1 Essential Tools for Successful Installation
- **Wire Stripper:** Essential for removing the outer insulation from the Cat6 cables without damaging the internal wires.
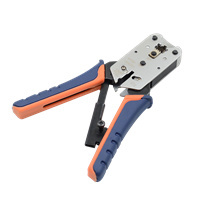
- **Crimping Tool:** Used to attach connectors to the ends of the cables securely.
- **Screwdriver:** Required for securing the keystone jack into the wall plate.
- **Cable Tester:** A vital tool for verifying that the network connections are functioning correctly post-installation.
2.2 Optional Tools to Enhance Your Setup
- **Labeling Machine:** For organizing and labeling cables, which can help during troubleshooting or future upgrades.
- **Cable Management Clips:** Useful for keeping cables tidy and organized within walls or cable trays.
3. Preparing the Cat6 Cables for Termination
Preparation is key to a successful termination. Properly prepared cables ensure a cleaner installation and better performance.
3.1 Stripping the Cable Insulation
Begin by using the wire stripper to remove about 2 inches of the outer insulation from the Cat6 cable. Be careful to avoid cutting into the inner wires, as this can compromise their integrity and performance.
3.2 Arranging the Wires According to TIA Standards
Inside the Cat6 cable, you will find four twisted pairs of wires, typically color-coded. Follow the TIA/EIA 568-B color code standards for arranging these wires. The standard order is as follows:
- Pair 1: White/Blue & Blue
- Pair 2: White/Orange & Orange
- Pair 3: White/Green & Green
- Pair 4: White/Brown & Brown
Organizing the wires in this manner will help ensure optimal performance and compatibility with other networking devices.
4. Step-by-Step Guide to Terminating Cat6 Keystone Jacks
The actual termination process involves several critical steps:
4.1 Connecting Wires to the Keystone Jack
1. Insert the arranged wires into the corresponding slots on the keystone jack. Each slot is usually labeled for ease of installation.
2. Ensure that the wires reach the end of the jack and that the insulation is close to the termination point. This helps reduce interference and maintains performance.
4.2 Ensuring Secure Connections
Using the punch-down tool, firmly press down on each wire to secure it in place. You should hear a slight click, indicating a secure connection. After all wires are connected, trim off any excess wire that may extend beyond the jack.
5. Testing the Termination
Once the keystone jack is terminated, thorough testing is necessary to ensure everything is functioning correctly.
5.1 Using a Cable Tester
Connect one end of your cable to a cable tester and the other end to a corresponding device. A successful test will show that all pairs are functioning correctly without any miswires or shorts.
5.2 Troubleshooting Common Issues
If the tester indicates a problem, recheck the connections. Common issues include:
- Miswired pairs
- Insufficient punch-down pressure
- Damaged wires from stripping
Correcting these problems promptly can save significant time and effort later on.
6. Best Practices for Long-Lasting Connections
To ensure that your keystone jack installations remain reliable and effective over time, consider the following best practices:
- **Avoid Over-Twisting:** Excessively untwisting the pairs can lead to signal degradation.
- **Proper Cable Management:** Use clips and ties to keep cables organized and prevent stress on connections.
- **Use Quality Components:** Invest in high-quality keystone jacks and cables for better performance and durability.
7. Frequently Asked Questions (FAQs)
**Q1: What is the difference between Cat5e and Cat6 cables?**
A1: Cat6 cables offer higher bandwidth and better performance at longer distances compared to Cat5e cables, making them suitable for demanding network applications.
**Q2: Can I terminate Cat6 cables without a punch-down tool?**
A2: While it's possible, using a punch-down tool ensures a secure connection and minimizes the risk of damaging the wires during termination.
**Q3: How do I know if my keystone jacks are compatible with my cables?**
A3: Always check the specifications of the keystone jacks and cables to ensure they are rated for the same category (e.g., Cat6).
**Q4: What is the maximum distance for Cat6 cable runs?**
A4: The maximum recommended distance for a Cat6 cable run is 328 feet (100 meters) to maintain optimal performance.
**Q5: Can I reuse keystone jacks?**
A5: While it is possible to reuse keystone jacks, it is often better to use new ones for optimal performance, especially if the original installation was not done correctly.
8. Conclusion
Successfully terminating Cat6 keystone jacks is essential for creating a reliable and efficient network environment. By following the detailed steps outlined in this comprehensive guide, you can ensure that your installations meet professional standards and provide high-speed connectivity for your devices. With the right tools, preparation, and adherence to best practices, you will be well on your way to mastering the art of network cable termination. Whether you're setting up a new network or upgrading an existing one, understanding these installation processes will empower you to achieve optimal performance from your networking infrastructure.
Latest news & events
Jul 07,2025
High Performance Patch Cord HBT RJ45B for Reliable Network Connections
The HBT-RJ45B Patch Cord offers durable performance with CE and ISO certifications, ensuring stable connections in home and enterprise networks.
Learn moreJul 01,2025
Understanding the Lifecycle of FTP Keystone Jacks: From Manufacturing to Application
Understanding the Lifecycle of FTP Keystone Jacks: A Comprehensive Guide In the realm of construction and decorative materials, particularly in networking solutions, **FTP keystone jacks** play a pivotal role in ensuring seamless connectivity. They are essential components that facilitate the transmission of data in various environments, from residential settings to large-scale commercial applicat
Learn moreJun 28,2025
Understanding Modular Plug 8P8C: Essential Insights for Professionals
Modular plugs, specifically the 8P8C (8 Position 8 Contact), are integral components in modern networking and telecommunications systems. Often referred to as RJ45 connectors, these plugs are primarily used for Ethernet cables, ensuring stable data transmission in various applications. Understanding the characteristics and uses of the modular plug 8P8C can significantly benefit professionals in th
Learn moreJun 25,2025
Transform Your Wiring Setup: Benefits of a 48 Port Cat6 Patch Panel Table of Contents Introduction to 48 Port Cat6 Patch Panels What is a Patch Panel and Its Functionality? Benefits of Using a 48 Port Cat6 Patch Panel Enhanced Organization of Cabling Improved Network Performance Future-proofing Your Network Cost-effectiveness and Scalability Installation and Setup of a 4
Learn more

