
Maximize Your Network Efficiency with a 48 Port Cat6 Patch Panel
Maximize Your Network Efficiency with a 48 Port Cat6 Patch Panel
Networking has become a critical component in today's technology-driven world. As both homes and businesses increasingly rely on reliable internet connections, the importance of efficient network management cannot be overstated. One of the most effective ways to enhance and manage connectivity is through the use of a **48 Port Cat6 Patch Panel**. This article will delve into the numerous benefits, installation guidance, and optimization strategies that come with utilizing such a patch panel.
Table of Contents
- Understanding the Benefits of a 48 Port Cat6 Patch Panel
- How to Install a 48 Port Cat6 Patch Panel
- Connecting Devices to Your Patch Panel
- Effective Network Management Strategies
- Troubleshooting Common Issues with Patch Panels
- Best Practices for Maintaining Your Patch Panel
- 48 Port Cat6 Patch Panel vs. Other Options
- Frequently Asked Questions about 48 Port Cat6 Patch Panels
Understanding the Benefits of a 48 Port Cat6 Patch Panel
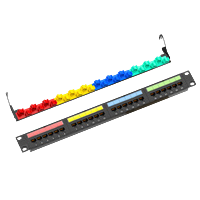
A **48 Port Cat6 Patch Panel** is an essential piece of equipment designed to facilitate the organization and management of network cables. By serving as a central point for connection and routing, it offers several crucial benefits:
1. Enhanced Cable Management
One of the primary advantages of using a patch panel is the improved cable management it provides. By consolidating all network cables into a single panel, it reduces clutter, making the setup not only more visually appealing but also easier to troubleshoot.
2. Efficient Use of Space
A patch panel allows for a more efficient use of space, particularly in server rooms or network closets, where multiple cables can become overwhelming. The compact design maximizes available area while ensuring that cables are organized and accessible.
3. Simplified Network Changes
Networking needs often evolve, and a patch panel simplifies the process of making changes. Whether you need to add new devices or change existing connections, a patch panel allows for quick adjustments without the need for extensive rewiring.
4. Improved Signal Quality
Using high-quality Cat6 cables connected to a well-designed patch panel can lead to better signal quality. Cat6 cables support higher frequencies and can transmit data at speeds up to 10 Gbps over short distances, making them ideal for modern networking demands.
How to Install a 48 Port Cat6 Patch Panel
Installing a **48 Port Cat6 Patch Panel** may seem daunting, but with the right tools and guidance, it can be a straightforward process. Here’s a step-by-step guide to ensure a successful installation:
1. Gather the Necessary Tools
Prior to beginning the installation, gather the following tools:
- Wire cutter/stripper
- RJ45 connectors
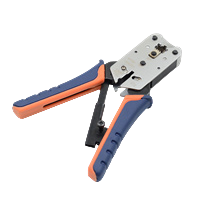
- Crimping tool
- Cable management clips
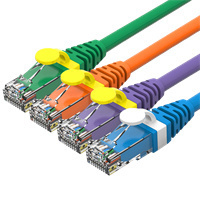
- Patch cables
2. Choose the Ideal Location
Select a suitable location for your patch panel, ensuring it is in a cool, dry area with proper ventilation. Mount the panel securely to a wall or rack, ensuring easy access to both the front and back.
3. Run the Cat6 Cables
Run your Cat6 cables from each device or wall outlet to the patch panel location. Be mindful to avoid sharp bends or kinks in the cables, as this can degrade performance.
4. Terminate the Cables
Follow the T568A or T568B wiring standard to terminate the cables. Strip the cables, arrange the wires according to the chosen standard, and crimp on RJ45 connectors. Make sure to test each cable for proper connections before proceeding.
5. Connect Cables to the Patch Panel
Insert each terminated cable into its corresponding port on the patch panel. Ensure a secure fit to prevent disconnections.
Connecting Devices to Your Patch Panel
Once the installation is complete, connecting devices to your **48 Port Cat6 Patch Panel** is a straightforward process. Here’s how to do it:
1. Use Quality Patch Cables
Utilize high-quality patch cables to connect the patch panel to your network switch or router. High-quality cables will ensure optimal performance and reliability.
2. Label Your Connections
Labeling each connection can save significant time when troubleshooting or making changes. Use a label maker or handwrite labels to indicate which device is connected to each port.
3. Test the Network
After all connections are made, conduct a thorough network test to ensure that all devices are communicating correctly. Utilize network testing tools to check for any issues.
Effective Network Management Strategies
Once your **48 Port Cat6 Patch Panel** is set up, it’s essential to implement effective network management strategies:
1. Regularly Monitor Performance
Keep an eye on network performance metrics such as speed and uptime. Monitoring can identify potential issues before they become major problems.
2. Update Firmware and Software
Ensure that all network devices have the latest firmware and software updates installed. This can improve performance and security.
3. Maintain Documentation
Maintain accurate documentation of your network configuration, including cable runs, device connections, and changes made over time. This will facilitate future upgrades and troubleshooting.
Troubleshooting Common Issues with Patch Panels
Even with a well-setup patch panel, issues can arise. Here’s how to troubleshoot common problems:
1. Identify Connection Issues
If devices are not connecting, check to ensure that all cables are securely connected at both ends. A loose connection is often the culprit.
2. Test Individual Cables
Use a cable tester to check for continuity and proper wiring on individual cables. This can help identify faulty cables that need replacement.
3. Inspect for Physical Damage
Visually inspect cables for signs of physical damage, such as fraying or kinks. Damaged cables may need to be re-terminated or replaced.
Best Practices for Maintaining Your Patch Panel
To ensure long-lasting performance from your **48 Port Cat6 Patch Panel**, adhere to these best practices:
1. Keep It Clean
Regularly clean the patch panel and surrounding areas to prevent dust build-up. Dust can affect both performance and the lifespan of your equipment.
2. Organize Cables Effectively
Use cable management clips and ties to keep cables organized and prevent tangling. This helps with airflow and reduces the risk of damage.
3. Schedule Regular Maintenance
Establish a maintenance schedule to review connections, test cables, and ensure everything is functioning as expected. Consistent upkeep can prevent unexpected downtime.
48 Port Cat6 Patch Panel vs. Other Options
When considering network solutions, it’s essential to weigh the benefits of a **48 Port Cat6 Patch Panel** against other available options:
1. 24 Port Patch Panels
While a 24 port patch panel may be sufficient for smaller networks, it can quickly become limiting as businesses expand. A **48 Port Patch Panel** offers more flexibility for future growth.
2. Fiber Optic Patch Panels
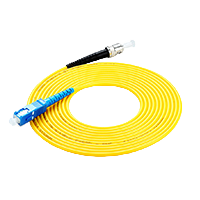
For environments requiring high-speed connections over long distances, fiber optic patch panels may be viable. However, they often come at a higher cost and are best suited for specific applications.
3. Managed Switches
While managed switches provide more advanced features such as VLAN support and monitoring, they can be more complex to configure and manage compared to a patch panel setup.
Frequently Asked Questions about 48 Port Cat6 Patch Panels
1. What is a patch panel used for?
A patch panel is used to manage and organize network cables, allowing for easy connections and modifications to devices within a network.
2. How do I choose the right patch panel?
Consider the number of ports you need, the type of cables being used (Cat5e, Cat6, etc.), and your network's future expansion plans when selecting a patch panel.
3. Can I use a patch panel for both residential and commercial networks?
Yes, patch panels are suitable for both residential and commercial environments, providing efficient management of network connections in both settings.
4. Do I need any special tools to install a patch panel?
Standard tools like a wire cutter/stripper and crimping tool are sufficient for installing a patch panel. Ensure you also have quality cables and connectors.
5. How often should I maintain my patch panel?
Regular maintenance is recommended every 6-12 months, or more frequently if your network experiences high usage or rapid changes.
Conclusion
Effective networking is paramount in today’s fast-paced digital landscape. A **48 Port Cat6 Patch Panel** not only streamlines your network's organization but also enhances performance and ease of management. By understanding its benefits, following installation guidelines, and implementing best practices, you can ensure that your network operates at peak efficiency. Whether for a residential setup or a complex commercial infrastructure, investing in a high-quality patch panel is a strategic decision that will pay dividends in reliability and performance.
Latest news & events

Mar 17,2026
Keystone Jack: Essential Component for Modern Networking Solutions
Newest Keystone jack brands offer high-performance, reliable, and versatile connectors for modern networking needs
Learn more
Mar 12,2026
Network Cable Boots Enhancing Protection and Reliability in Modern Cabling Systems
China Network Cable Boots factory produces premium PVC covers that protect Ethernet connectors and ensure stable data flow
Learn more
Mar 11,2026
RJ45 Connector: The Essential Interface Driving Modern Network Connectivity
In the rapidly evolving world of digital communication, reliable data transmission is fundamental to the functioning of modern networks. One of the most widely used components enabling this connectivity is the RJ45 connector
Learn more

HYCONNECT provides integrated solutions for cabling infrastructure system copper and fiber. The major components including Cat5e/6/6A/7/8 keystone jack,patch panel,faceplate,plug and cable management,fiber optic patch cable,adapter,and fiber patch panel
No. 240, New Zhoutang Road, Qiaotou Town, Cixi City , Ningbo Zhejiang, China
