
The Ultimate Guide to Choosing a 48 Port Cat6 Patch Panel: Unleash Your Network's Potential
The Ultimate Guide to Choosing a 48 Port Cat6 Patch Panel
When it comes to setting up a robust network, the choice of a patch panel can significantly impact your system's performance and efficiency. Among the various options available, a 48 port Cat6 patch panel stands out as a popular choice for businesses and organizations that require extensive connectivity solutions. This guide will delve deep into everything you need to know about selecting the perfect 48 port Cat6 patch panel for your networking needs.
Table of Contents
- Understanding the Importance of a Patch Panel
- What is a 48 Port Cat6 Patch Panel?
- Key Features to Consider When Choosing a Patch Panel
- Installation Guide for 48 Port Cat6 Patch Panels
- Maintaining Your Patch Panel
- Common Mistakes to Avoid When Choosing a Patch Panel
- Frequently Asked Questions
Understanding the Importance of a Patch Panel
A patch panel is a critical component in any structured cabling system, serving as a central point for connecting and managing network cables. It facilitates organization, enhances network performance, and simplifies troubleshooting. By utilizing a patch panel, network administrators can easily reroute connections without needing to rewire the entire system, thereby increasing flexibility and efficiency.
What is a 48 Port Cat6 Patch Panel?
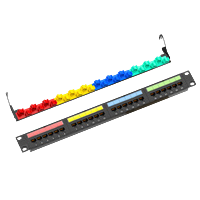
A 48 port Cat6 patch panel is specifically designed to accommodate up to 48 Ethernet cables, making it an ideal solution for businesses with significant networking demands. These patch panels are designed to support Cat6 cabling standards, which allow for high-speed data transmission rates up to 10 Gbps over distances of up to 55 meters. This makes them perfect for modern applications that require fast and reliable connections.
Key Features to Consider When Choosing a Patch Panel
Selecting the right patch panel involves evaluating several key features that can impact performance and usability. Below, we explore the most important considerations to guide your decision.
Build Quality and Materials
The durability of a patch panel is paramount. Look for panels made from high-quality materials such as steel or aluminum that can withstand physical stress and prevent damage over time. A solid construction ensures longevity and reliability, especially in high-traffic environments.
Port Density and Organization
With a 48 port patch panel, effective organization becomes crucial. Consider how the ports are laid out. A well-organized panel will have clearly labeled ports for easier management and troubleshooting. Ensure that the panel allows for flexibility in port arrangements, making it easier to expand your network in the future.
Cabling Compatibility
Ensure that the patch panel you choose is compatible with Cat6 cabling standards. Some panels may also support backward compatibility with Cat5e and Cat5 cables, which can be beneficial if you have existing infrastructure that requires integration.
Installation and Mounting Options
Consider how the patch panel will be installed. Options include wall-mounted, rack-mounted, or floor-mounted installations. Evaluate the available space and the installation environment to determine the best fit for your needs. Additionally, check if the panel has easy access to ports for future expansions and maintenance.
Labeling and Documentation
Proper labeling is essential for efficient network management. Look for panels that offer clear labeling options, allowing you to easily identify each port's function. Some patch panels even come with labeling kits or slots to insert labels, which can greatly simplify troubleshooting and network changes.
Cost-Effectiveness and Warranty
While it may be tempting to choose the cheapest option available, investing in a quality patch panel can save you money in the long run by reducing maintenance costs and downtime. Look for products that offer a warranty, as this indicates the manufacturer's confidence in their product's durability and performance.
Installation Guide for 48 Port Cat6 Patch Panels
Installing a 48 port Cat6 patch panel can seem daunting, but with the right guidance, it can be a straightforward process. Here’s a step-by-step approach to ensure a successful installation:
Step 1: Gather Your Tools
Before starting the installation, gather the necessary tools, which typically include:
- Wire stripper
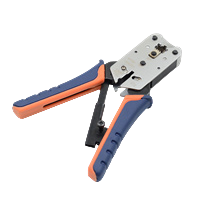
- Crimping tool
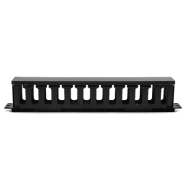
- Cable management clips
- Labels and a labeling tool
Step 2: Prepare Your Cables
Measure and cut the Cat6 cables to the required lengths. Strip the outer insulation and untwist the pairs carefully, maintaining their order. Follow the T568A or T568B wiring standards for consistent performance.
Step 3: Insert Cables into the Patch Panel
Begin inserting the prepared cables into the appropriate ports on the patch panel. Be sure to follow the labeling and wiring scheme to ensure that the connections are accurate. Use the punch-down tool to secure the wires in place.
Step 4: Label Each Port
Once all cables are connected, label each port according to its function or destination. This will make future troubleshooting and modifications much easier.
Step 5: Test Your Connections
After installation, it's crucial to test each connection using a cable tester to ensure that everything is functioning correctly. This step helps prevent disruptions in network performance down the line.
Maintaining Your Patch Panel
Regular maintenance of your patch panel is essential to ensure optimal performance and longevity. Here are some tips to keep your patch panel in top shape:
- Perform periodic inspections to check for loose connections or signs of wear.
- Keep the area surrounding the patch panel clean and dust-free.
- Organize cables and use cable ties or management clips to prevent tangling.
- Label any changes made to the network to keep documentation up to date.
Common Mistakes to Avoid When Choosing a Patch Panel
To ensure you make the best decision when selecting a patch panel, avoid these common pitfalls:
- Ignoring future scalability: Always consider your future needs to avoid frequent replacements.
- Choosing aesthetics over functionality: While looks matter, performance should be the primary focus.
- Neglecting compatibility: Ensure that the patch panel works seamlessly with your existing network setup.
- Overlooking warranty and support: Always check the warranty and available support options before making a purchase.
Frequently Asked Questions
1. What is the difference between Cat5e and Cat6 patch panels?
Cat6 patch panels are designed to support higher speeds and bandwidth compared to Cat5e. They are better suited for Gigabit Ethernet and can handle more data traffic efficiently.
2. Can I use a 48 port Cat6 patch panel for non-Cat6 cables?
Yes, many Cat6 patch panels are backward compatible with Cat5e and Cat5 cables. However, using lower category cables may limit the overall performance.
3. How do I know if my installation is successful?
After installation, use a cable tester to check for continuity and ensure that all connections are correctly made. A successful installation will show no faults in the connections.
4. What is the maximum length for Cat6 cables?
For optimal performance, the maximum length for a Cat6 cable run should not exceed 100 meters (328 feet), including the patch panel and any other connections.
5. How often should I perform maintenance on my patch panel?
It's advisable to inspect your patch panel at least every six months to ensure that all connections are secure and to clean the area to prevent dust buildup.
Conclusion
Choosing the right 48 port Cat6 patch panel is vital for establishing a reliable and efficient network. By understanding the critical features, installation processes, and maintenance requirements, you can make an informed decision that meets your organization’s needs. Whether you are upgrading your existing infrastructure or setting up a new network, selecting a high-quality patch panel will contribute significantly to your network's overall performance and reliability. With this comprehensive guide, you are now better equipped to navigate the selection process and enhance your connectivity solutions.
Latest news & events

Mar 17,2026
Keystone Jack: Essential Component for Modern Networking Solutions
Newest Keystone jack brands offer high-performance, reliable, and versatile connectors for modern networking needs
Learn more
Mar 12,2026
Network Cable Boots Enhancing Protection and Reliability in Modern Cabling Systems
China Network Cable Boots factory produces premium PVC covers that protect Ethernet connectors and ensure stable data flow
Learn more
Mar 11,2026
RJ45 Connector: The Essential Interface Driving Modern Network Connectivity
In the rapidly evolving world of digital communication, reliable data transmission is fundamental to the functioning of modern networks. One of the most widely used components enabling this connectivity is the RJ45 connector
Learn more

HYCONNECT provides integrated solutions for cabling infrastructure system copper and fiber. The major components including Cat5e/6/6A/7/8 keystone jack,patch panel,faceplate,plug and cable management,fiber optic patch cable,adapter,and fiber patch panel
No. 240, New Zhoutang Road, Qiaotou Town, Cixi City , Ningbo Zhejiang, China
